- No products in the cart.
How to Acclimate New Fish into Your Aquarium.
03
Jun
Acclimation of a new fish into an aquarium can be stressful for a fish. Here are a few tips to make the process easy and prevent future disaster.
That fish you just purchased from your local pet store or online may be harboring an unwanted gift. You just purchased more than you can see in your new arrival plastic bag. And this will not be something exciting.You may be the lucky owner of external parasites, bacteria, fungi, marine velvet disease, dinoflagellates, clownfish disease, gill flukes, fin rot, tail rot and algae. In addition, open wounds and possible infections.
Whew! That’s a lot of extra surprises in one bag.
Acclimating your fish into a new environment can be a shock for any creature, but for fish it is particularly stressful entering their new home. Not only will a new aquarium tank be completely unfamiliar for your new fish, but the water will likely be of a different quality. Slight changes in water temperature, pH, and other factors make a huge difference in a fish’s life. To keep your fish safe, comfortable and healthy, there are specific actions you should take when introducing fish to a new aquarium tank.
The Quarantine Tank
Though not a requirement of our acclimation procedures, we highly recommend that all aquatic life be quarantined in a separate aquarium for a period of two weeks to reduce the possibility of introducing diseases and parasites into your aquarium and to ensure they are accepting food, eating properly, and are in optimum health before their final transition to your main display.
HydroPlex™ is a great quarantine tank product to consider. Add 2 oz. (60 ml) of HydroPlex™ per 5 gal. (20 liters) of water and. Do not use carbon filtration or other chemical absorbents. Dosage may be repeated after 24 hours and every 48 hours thereafter for up to 7 days.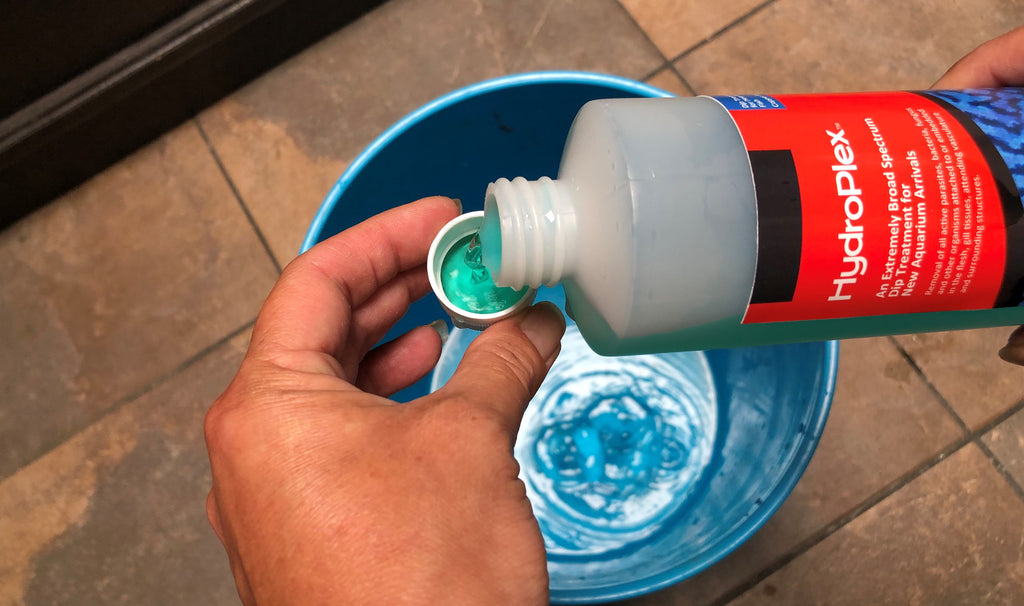
Dip Treatment
We highly recommend using a fish and plant cleaning product to reduce the number of unwanted hitchhikers into your aquarium. HydroPlex™ and HydroPlex™ NANO (perfect for Betta fish dip) are great products to increase the chances of survival for your new purchase. HydroPlex is an extremely broad-spectrum dip for cleaning new arrivals of external parasites, bacteria, fungi & algae. HydroPlex also helps to heal open wounds and can be used in hospital/quarantine tanks. HydroPex NANO can be used effectively in new fish transport bags. A full dip treatment with HydroPlex NANO takes only 90 minutes to 2 hours.
Here are a few tips for a successful acclimation process:
Precautions to Consider
- Research the species and make sure it will not grow too large for your tank.
- Talk to an expert at the fish store.
- Do not select fish from a tank that has a high number of dead fish. Pick fish that are active in their tanks in the pet store. Compare the fish to those of the same type around it. Is it acting like the others or is it off by itself? Is it able to swim normally?
- Make sure the aquarium fish species you are adding will be compatible with your existing aquarium fish species.
- Test your water quality before adding your new fish. Your pH and temperature should match that of the fish shop’s where your pet is coming from.
- Reduce stress impact in the aquarium. Make sure your tank has plenty of “safe places” like plants, driftwood, and reef rocks to provide good cover so that your fish will be less stressed.
- Feed the fish in your aquarium before adding any new fish. This will make the existing fish less aggressive.
- Dim the lights in the aquarium room. Before adding your new fish, turn your aquarium lights off. This will create a less stressful environment.
- Do not stare closely into the transfer bag. You may appear like a large predator and the fish does not need the added stress of a predator staring at them during acclimation.
- Keep your movements slow. Quick movements shift the new fish into a pure panic mode.
The Acclimation Process
When you are ready to add your fish into the aquarium, two methods to consider:
Floating Method
- This is a slow process. Do not rush acclimation process.
- Turn off aquarium lights.
- Dim the lights in the room. Never open the box in bright light.
- Float the sealed bag in the aquarium for 15 minutes. Never open the plastic shipping bag at this time. This step allows the water in the shipping bag to adjust slowly to the temperature in the aquarium, while maintaining a high level of dissolved oxygen.
- After floating the sealed shipping bag for 15 minutes, remove the metal clip or rubber band and roll the top edge of the bag down one two inches to create an air pocket within the lip of the bag. This will enable the bag to float on the surface of the water.
- Add 1/2 cup of aquarium water to the shipping bag.
- Repeat step 5 every four minutes until the shipping bag is full.
- Lift the shipping bag from the aquarium and discard half the water from the bag.
- Float the shipping bag in the aquarium again and proceed to add 1/2 cup of aquarium water to the shipping bag every four minutes until the bag is full.
- Remove the shipping bag from the aquarium.
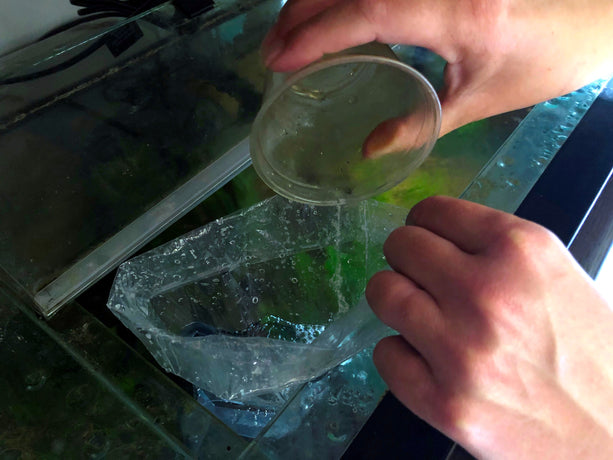
- This is a perfect time to use the dip treatment with HydroPlex™ for new arrivals:
- Transfer contents of bag including water, fish, corals (corals should be closed) or invertebrates into a premeasured container. (Aquarium water can be added to container if needed).
- Add HydroPlex to container at a ratio of 1 oz. (30 ml) per quart (1 liter) of water.
- Leave livestock in water for 10 minutes, then transfer livestock into display tank (or quarantine tank if used.)
- If a fish shows undo stress during dip, remove them as the job is done.
- Net aquatic life from the shipping bag and release into the aquarium. Remove fish from container and place into quarantine or display tank.
- Discard the water used for the HydroPlex dip bath.
- Never release shipping water directly into the aquarium.
Drip Method
This method is considered more advanced. It is geared toward sensitive inhabitants such as corals, shrimp, sea stars, and wrasses. You will need airline tubing and must be willing to monitor the entire process. Gather a clean, 3 or 5-gallon bucket designated for aquarium use only. If acclimating both fish and invertebrates, use a separate bucket for each.
- Start with Steps 1-4 of the floating method to acclimate water temperature.
- Carefully empty the contents of the bags (including the water) into the buckets, making sure not to expose sensitive invertebrates to the air. Depending on the amount of water in each bag, this may require tilting the bucket at a 45 degree angle to make sure the animals are fully submerged. You may need a prop or wedge to help hold the bucket in this position until there is enough liquid in the bucket to put it back to a level position.
- Using airline tubing, set up and run a siphon drip line from the main aquarium to each bucket. You’ll need separate airline tubing for each bucket used. Use a airline control valve to regulate flow from the aquarium.
- Begin a siphon by sucking on the end of the airline tubing you'll be placing into each of the buckets. When water begins flowing through the tubing, adjust the drip (by tightening the control valve) to a rate of about 2-4 drips per second.
- When the water volume in the bucket doubles, discard half and begin the drip again until the volume doubles once more. This may take about one hour.
- This is a perfect time to use the dip treatment with HydroPlex™ for new arrivals:
- Transfer contents of bag/bucket including water, fish, corals (corals should be closed) or invertebrates into a premeasured container. (Aquarium water can be added to container if needed)
- Add HydroPlex to container at a ratio of 1 oz. (30 ml) per quart (1 liter) of water.
- Leave livestock in water for 10 minutes, then transfer livestock into display tank (or quarantine tank if used.)
- If a fish shows undo stress during dip, remove them as the job is done.
- At this point, the specimens can be transferred to the aquarium.
- Discard both the bag and the enclosed water. A tiny amount of the diluted water will escape into the aquarium; this is O.K. Also, to avoid damage, please remember never to touch the "fleshy" part of live coral when handling.
NOTE: Sponges, clams, and gorgonias should never be directly exposed to air. Gently scoop them out of the drip bucket with the specimen bag, making sure they’re fully covered in water. Submerge the bag underwater in the aquarium and gently remove the specimen from the bag. Next, seal off the bag underwater by twisting the opening, and remove it from the aquarium.
Purchasing and adding a new species into your aquarium is an exciting experience. Making the acclimation flawless and removing and unwanted hitchhikers will help you enjoy the hobby even more.